To read this in Italian, click here.
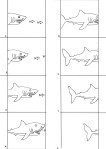
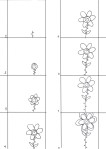
Saturday’s workshop was probably the one of the most challenging, but fun workshops yet, we made flip books -which are basically a series of drawings that seem to move, as the pages are rapidly turned. This is a great activity to do for transit verbs (a fiish swimming, a plane flying etc) or to teach stages (a seed growing into a flower or a tree) – Keep in mind that the best ideas are the simplest ideas – especially if it is your first time animating.
What you will need:
- a pencil
- colored pencils
- post-its
- a stapler
- tape (masking or scotch tape)
For younger kids, it is easier to grasp the concept if they have an example.
1. Print off one of the sheets above.
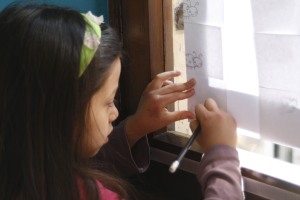
2. Put a post-it on top of each frame (keeping the sticky part on the left hand side) and use a pencil to lightly trace each drawing.
 *If it’s hard to see the lines, you can always put the sheet against the window and then trace.
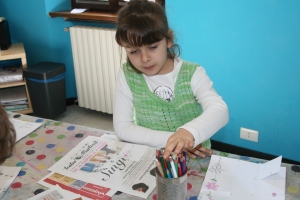
3. Color each of the frames (make sure that you color every frame in the same way -for example: if you color the flower yellow with a green stem, it should be yellow with a green stem in all the frames),
4. Write the title of your flip book on a post it.
5. Take 2 blank post its and set them on the table (this will add pages to the book and make it easier to flip). Stack the your drawings on top of these 2 blank post-its, in sequence working from frame 8 to frame 1 (so frame 8 should be on the bottom and frame 1 on the top). Take 2 more blank post-its and put them on the top. Stack you title page on the very top. Stack as neatly as you can, the neater it is, the easier it will be to flip.
6. Bend the left side of your book back about 5 cm. This will make the pages stiffer and easier to flip.
7. Staple the ‘binding’ and secure the staples by covering them with a strip of tape.
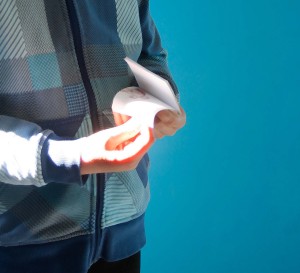
8. Now flip!
Older kids may be able to grasp the concept of how to draw a flip book on their own. Here’s how to do it:
1. Think of something that can move from left to right or up and down (without having to draw many complicated movements. For example a fish swimming, a plane flying through the sky, a car driving on the road, a hot air balloon rising in the sky, etc. A person walking is quite or a horse running is quite complicated and won’t work well for the method we are using.
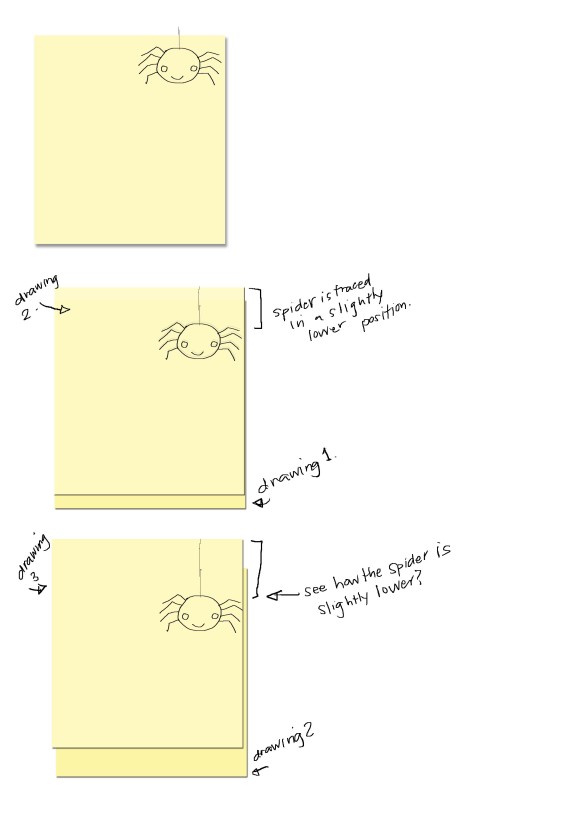
2. Draw your idea on a post it, keeping the sticky side to the left. We have drawn a spider that will lower itself down it’s web. If you are going to have something go from up to down, like we are, make sure the drawing stays on the right hand side so you can see it as it flips.
3. Take another post-it (post -it #2) and put it on top of the first post it (post-it #1) so that the right edges are lined up, but the top edge of #2 is slightly above #1. Remember to put the sticky side on the left. Trace. See how our spider looks slightly lower.
4. Do this again and again, until you have at least 8 drawings. You can have more than (, because the more drawings you have and the slighter the movement when you retrace, the better your flip book will work. Less than 8 drawings makes it hard to flip the book and the animation won’t be a smooth.
5. Color all your drawings.
6. Neatly stack (in order) all your drawings, starting with the last one on the bottom. (If you have only 8 drawings add 2 blank post-its to the front and 2 to the back, this will make it a bit easier to flip and see the animation).
7. Make a title page and put it on the top of your stack.
8. Fold back the left hand side of your stack about 5 mm.
9. Staple and then tape over the staples
10. You are ready to flip!

