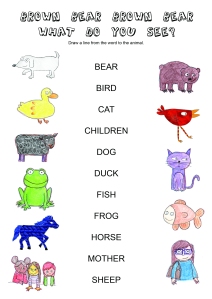
Brown Bear Word Match

Per leggere questo post in italiano, cliccate qui.
It’s been a while since we’ve done something on Brown Bear.  This is pretty simple, just match the words to the correct pictures.  A fun way to use this in a classroom is to divide the kids up into teams.  Give each team 1 worksheet and 1 pencil.  Each person on the team may connect only 1 word to an animal and then must pass the pencil onto someone else.  The first team to finish the worksheet correctly gets 4 points, the next gets 3, then 2, then 1.  Since this game takes very little time to play, we laminated the sheets so we can use them more than once.

Brown Bear is a great book to get ESL kids reading and writing.  Usually we read together so that they know the rhythm and the chant of the book first.  When we read the words, it is easier because they know what the word means.

Ocean In A Bottle Workshop

Per leggere questo post in italiano, cliccate qui.

This was the last workshop of the year and it was a fun one!   We made a jellyfish and put it into a bottle, so we can take the ocean with us where ever we go!

Supplies:

  • a transparent or translucent plastic bag (We noticed some bags work better than others, if they are too thin, the jelly doesn’t float as well.  Some types of plastics have a lot of static and bubbles stick to it. You may have to experiment a bit)
  • a transparent bottle with a wide mouth (the longer the bottle, the better the jelly ‘swims’ to the top)
  • thread
  • food coloring

Fold your jellyfish into a ‘ghost’ like shape and loosely tie a head  (leave a small opening because you’ll will fill the head with water later on).

Keeping the head at the top, spread out the bag and then cut from the corner to the neck. You should have 4 ‘triangles.’ Cut cut from the edges to the neck to make 8 ‘triangles.’  Cut off every other triangle, you should have 4 triangles.

Now, cut out very skinny strips for the tentacles.

You should make about 3 or 4 legs per segment, which means that you will still have to cut away some more of the excess bag.  Trim the tentacles so they will be of different lengths.

Fill the bottle about 1/2 way with water.Fill the head part way with water (you will need to leave some room for air so the jellyfish will float up).  Carefully insert the jelly into the bottle and top the bottle off with water. **

Add in food coloring and close your bottle tightly.

Turn your bottle upside down over and over again and watch your jellyfish float to the top.  It’s absolutely mesmerize.

We found this great craft on BhoomPlay on how to make a jellyfish in a bottle.

*  If you’re jellyfish is not floating to the top too well, try pulling him (or her) out of the bottle and blow a little bit of air into the head.  If you have a lot of air, the jellyfish will float to the top quickly.  If you have too little or no air, the jellyfish will float slowly or not at all.   If you find a the right ratio of air to water, you jelly will float and will full everyone into thinking he (or she) is real!

If You Give A Pig A Pancake (Mother’s Day) Workshop

Per leggere questo post in italiano, cliccate qui.

If You Give A Pig A Pancake is a story about a spunky little pig and all the silly things that happens just by giving her a pancake.  And reading about pancakes reminds us about….breakfast on Mother’s Day!

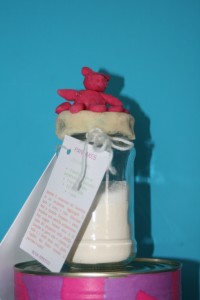
This was a very special workshop as it was dedicated to our hardworking and ever supportive mothers.  Since our moms are always waking up early and getting breakfast ready for us, we got breakfast ready for them (well, sort of), we made Pancakes in A Jar.

Supplies:

  • a clean jar (that has a volume of slightly more than a cup)
  • play dough (white and pink)

dry ingredients for pancakes:

  • 1 cup (125 g) all-purpose flour
  • 3 tbls (30 g) white sugar
  • 1 tsp (3 g) baking powder
  • 1/2 tsp (2 g) baking soda
  • 1/4 tsp (2 g) salt

 First – measure out all the dry ingredients and put them into the jar.

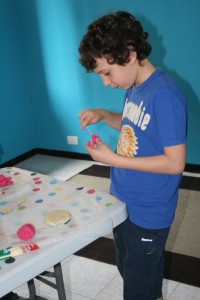
Next – use the white play dough to cover the lid of the jar.  Take off the excess dough so it wont go on the inside of the lid.  (The dough will slide around a bit, try and fit it on as best you can, but it will shrink as it dries and stick on a little better).

Use the pink play dough to make a pig.  Stick it to the top of the lid. You made need a little bit of water to do this. Some kids made a 3 dimensional pig sitting up, some made it stand on all four legs and some made a 2 dimensional version.  How will you make yours?

Lastly – make a Mother’s Day card with the rest of the recipe inside:

  • pancake mix
  • 1 cup  (235 ml) milk
  • 1 egg
  • 2 tbls (30 ml) vegetable oil

Pour the ingredients from the jar into a bowl.  Pour in the milk, egg and vegetable oil. Mix until smooth. Heat non-stick pan over medium heat until water beads. Do not oil. Pour pancake mixture in 1/4 cup amounts. Turn when tops are covered with bubbles and edges look cooked. Remove from heat when pancake stops steaming.

Serve hot with butter and syrup or jelly.

And now you have your very special and original gift for your very special and original mom!

Swirls Workshop

Per leggere questo post in italiano, cliccate qui.

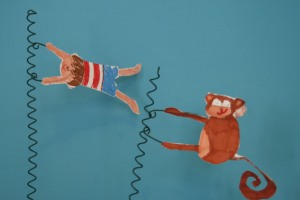
Swirl by Swirl, Sprials in Nature by written by Joyce Sidman e illustrated by Beth Krommes, is a beautiful book all about….you guessed it swirls and spirals.  The story was a bit difficult for the kids to follow, but it didn’t matter because the kids had lots of fun searching for all the spirals on every page.  After learning all about spirals, we made some of our own. Bloesem Kids had this wonderful project made with a few simple items you probably have around the house.

Supplies:

  • 18 gauge (or 1 cm) bendable wire (approx 1m + 10 cm)
  • pliers/wire cutters
  • pencil
  • pens and/or decorative paper
  • construction paper
  • wine cork
  • yogurt cup (optional)
  • glue (Elmers and hot glue)

1. If you are using a yogurt cup, hot glue the cork to the inside of the cup.  Hold onto the cork with your finger (so it doesn’t come loose) and use the nail to poke a hole though the bottom of cup and the cork (this will make it easier to push the wire through later on).

2.  Draw you design on a piece of construction paper, cut it out and retrace it onto another piece of construction paper.   Color and decorate the sides that face ‘outside.’ (Keep in mind that you are going to sandwich the wire between these to pieces – this way it is easier to figure out which sides to color).

3. Cut off appox 10 cm of wire (the length will vary, depending on the figure).  Bend into a c-shape. Use the pliers to make small loops at both ends.  If you are hold the C vertically, twist the loops so that the flat sides are parallel to the ground.

4.  Cut approx 1 m of wire (for the smaller kids we wrapped the ends with some tape so they wouldnt scratch themselves).  Wrap the wire around a pencil to make a coil.

5.  Remove the coil from the pencil and stretch it out (if your figure doesn’t ‘swirl’ down easily, try pulling so the coil will be longer).  Straighten a bit of one end and push it into the cork/yogurt cup. Thread your figure onto the spiral, and use the pliers to make a loop on the top end of the coil.  Your figure should spin down.

6.  If you have used a yogurt cup, use permanent markers and bits of fancy paper to decorate the cup.

Watch your figure swirl down the coil.

The Very Hungry Caterpillar Workshop

Per leggere questo post in italiano, cliccate qui.

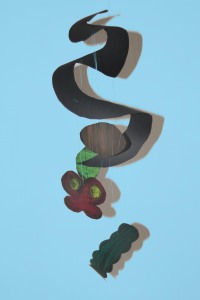
The Very Hungry Caterpillar by Eric Carle is one of our favorite stories – (you can see by how many times we’ve posted about it under categories to your right).  It has the some of the very important features to look for when reading to ESL or EFL kids – the story uses a fairly simple and basic language, the story is interesting and the pictures explain the what is happening even if the kids don’t understand many of the words.  This story is also adaptable to teach different topics- the life cycle of a butterfly (also order- first, second, next etc), days of the week, counting and food.  We focused on the life cycle of a butterfly for our project. We made mobiles and this is how we did it:Supplies:

  • paper plate (or construction paper and something to trace a circle)
  • black construction paper
  • a white or light colored pencil
  • crayons or oil pastels
  • scissors
  • large embroidery needle and thread

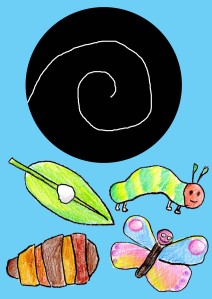
First take the paper plate and draw a large spiral shape and cut it out.

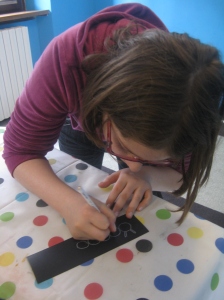
Use the white pencil to draw an egg on a leaf, a caterpillar, a cocoon and a butterfly (we folded the paper in half and drew on the fold).  (The kids were given 12 x 12 cm squares and asked the kids to draw as big as they could – otherwise they tended to draw something small in the center of the paper – making it hard to color, cut out and see). The drawing above is not to scale, but just to give you an idea of what the pieces you should have.

Cut out the pieces and color them in.

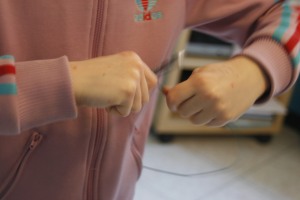
This part may require adult supervision – cut out 4 pieces of thread about the same length (about 25 cm) and 1 longer thread (about 40 cm).  Thread the needle with the large piece of thread, poke the needle through center of the spiral (going from top to bottom) and then poke it back through again (going from bottom to top).  Tie a knot at the end.  This will be used to hang the mobile.

Now attach the other pieces.  Using the shorter pieces of thread  poke the needle through the top of the spiral, poke it though one of your pieces (leaf, caterpillar, cocoon or butterfly), poke it back up through the spiral and tie a knot.  Repeat, making sure you evenly space each piece.  The order doesn’t really matter because it changes as the mobile spins.

Here is a cute little song to sing (to the tune of Up On The Rooftop) while you are working:

  • First comes a butterfly and lays an egg.
    Out comes a caterpillar with many legs.
    Oh see the caterpillar spin and spin,
    A little chrysalis to sleep in.
  • Oh, oh ,oh wait and see!
    Oh, oh, oh wait and see!
    Out of the chrysalis, my oh my,
    Out comes a beautiful butterfly!

(We didn’t make it up, but since we’ve seen it on many other sites, we can’t cite it since we don’t know who to give the credit to – but nice job whoever it was!)

Do The Bunny Hop!

Per leggere questo in italiano, cliccate qui.

Although the clothes in the video above may have gone out of style (oh the memories those outfits bring back!), Do the Bunny Hop is a classic that is here to stay! The lyrics and the moves are pretty simple so get ready to sing and dance and hop right in to Easter!

Put your right foot forward
Put your left foot out
Do the Bunny Hop
Hop, Hop, Hop!

Dance this new creation
It’s the new sensation
Do the Bunny Hop
Hop, Hop, Hop!

Let’s all join in the fun
Father, Mother, Son
Do the Bunny Hop
Hop, Hop, Hop!

And if you don’t have a chance to make your own Bunny Lumps Guess Who? game, you can print out these little guys and play.  You’ll have to check out the Bunny Lumps link above to see how to play the card version of Guess Who?  You know, we are always looking (or trying to invent) new games to play with the same cards, so here is another one to try on for size:

Three Of A Kind

Preparation: Print one copy each of the two bunny cards.

Object of the game: Find three of a kind

1-? players

Shuffle the cards.  Lay down 9 cards face up.  When a player sees 3 cards that share 3 similarities (3 ears of the same color, 3 noses of the same color, 3 bodies of the same color or 3 tails of the same color), she raises her hand and says ‘Three of a kind.’ The the player must say the names of the rabbits and what their similarities are.  That player gets the 3 cards and 3 new ones are dealt in their place.  If no one can find three similarities and it is agreed upon by all, the cards can be shuffled back into the deck and 9 new ones dealt (or you can take the three top cards off and 3 news can be dealt).  The winner is the person holding the most cards at the end of the game.

We just made up this game, so we’re not really sure how it will work out.  If you play it let us know, if we play it first, we’ll let you know!

Happy Easter!

Polar Bear What Did You Hear? Memory Game

Per leggere questo in italiano, cliccate qui.


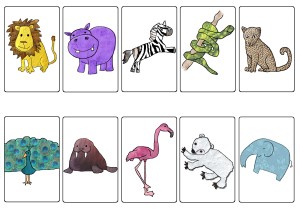
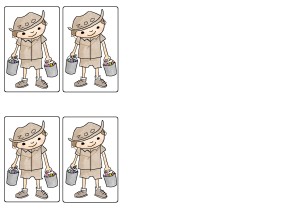
Animal Sounds Memory!  To play this game, print and cut out 4 copies of the first sheet with all the animals and one of the sheet with zookeeper.

Players: 2 or more

Object of the Game:  to memorize the noises and mimes of the animals in the right order.

1. Shuffle the deck and then place it face down in the center of the table. Decide who goes first.

2. The first player draws a card and places it face up next to the deck.  She says what the animal is and imitates the sound and gestures for that animal.

3.  The second player draws a card, places it face up on top of the first player’s card.  He makes the sound and mimes the animal on the first card and then of the card he has just turned over.  And so on and so forth until a player gets an animal or it’s sound.

4.  Once a card is turned over and covered by the next player’s card, it should not be turned over and covered again.

5.  When a player makes a mistake, instead of reshuffling the deck and beginning all over – the player takes a penalty card from the face up pile. Whoever has the most penalty cards (once all the cards have been turned over) begins the next round.

Variation – at the beginning of the game, set a time limit on how long the game will last. The winner is the person with the least penalty cards.

Other uses for the cards – you can also use these cards to play memory the classic way, Go Fish!  or Guess Who?

Polar Bear, Polar Bear, What Did You Hear? Workshop

Per leggere questo post in italiano, cliccate qui.

Polar Bear, Polar Bear What Did You Hear? by Bill Martin, Jr and Eric Carle is a wonderful book about animals and the sounds that they make.  It’s rhythmic, it has lots of repetition, fun animals to imitate – it’s an all around great story! Check out FindSounds and Sound Bible to hear real sounds that the animal make.

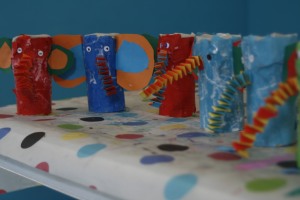
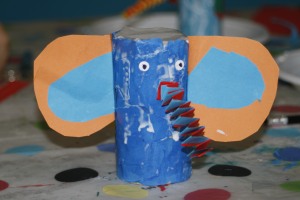
Since this book was all about animals and the sounds they make, we made an kazoo in the shape of an elephant – and you can use it to trumpet like an elephant.  Here’s how to do it:

  • You will need:
  • colored construction paper
  • Elmer’s Glue
  • an old paint brush
  • scissors
  • a tp roll
  • parchment paper or tracing paper
  • the bottom of a can or a lid, slightly larger than the diameter of the tp roll
  • googly eyes

1.  Use the lid to trace a circle on the parchment paper (or tracing paper).  Cut it out, cover one end of the tp roll and glue it on.

2.  Tear up a sheet of construction paper and use the paint brush to glue the paper to the side of the tp roll (paper mache style), making sure to cover the edges of the parchment paper only on the sides and not the part covering the end.

3. Draw 2 ears on construction paper, cut them out and glue them onto the side of the elephant’s head (you may have to fold a small flap in order to get them to stick more easily).

4.  Glue on 2 googly eyes.

5.  Now for the trunk: cut out 2 strips of paper about 1 cm wide, along the length (the long side) of a piece of construction paper.  Place the two ends together so that the strips for an L and place a dot of glue to hold the strips in place. Alternate folding each strip at a 90° angle to the other strip.  When you come to the end of each strip, glue down the ends (cut off any excess paper) and your twos strips of paper should now look like an accordion.  Glue this onto the elephant.  And tah-dah you are finished.

6.  After the elephant dries.  Put the open end of the elephant kazoo to your mouth and make a humming noise (but with your mouth opened).  This should make the paper at the end of the tube vibrate.  Now try and do the same thing making an elephant trumpeting noise.  It’s not easy at first, but once you get the hang of it, it’s lots of fun!

Father’s Day Workshop, A Totally Quiller Keychain

Per leggere questo post in italiano, cliccate qui.

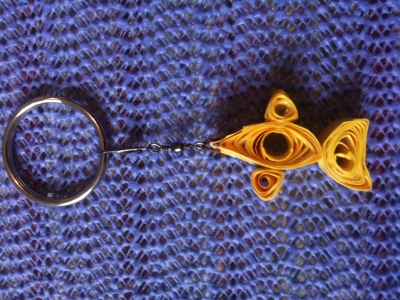
Father’s Day is the 19th of March in Italy, so the kids made a special present for their dads – a totally killer quilled key chain.

What’s quilling you ask? It’s taking strips of paper and curling them into spirals, you bend those spirals into different shapes and put them together to form an animal, a flower or whatever you want.  Check out Inna’s Creations for some basics on quilling and other great ideas.

Here’s how to quill a fish key chain:

Supplies:

  • colored paper (A4)
  • ruler
  • pencil
  • wooden skewer
  • elmer’s glue
  • Modge Podge or watered down elmer’s glue
  • old paintbrush
  •  needle (a big one)
  • embroidery thread
  • key chain ring

You probably have most of the things in the house, so this is a great impromptu activity – like on a rainy day, when you’re stuck inside and you don’t know what to do!

1. Use your ruler and pencil to measure out 4, 1 cm strips along the length of the paper. Carefully cut them out.

2. Take two strips and glue them together at the ends, so you have one long strip.

3: Fold one strip in half and cut it along the fold.

4.  There should be 4 strips total, 1 long, 1 medium and 2 short.  Take a short strip of paper and twirl it around the skewer and then take it off.  You should have a spiral. Do the same to each of the other strips.
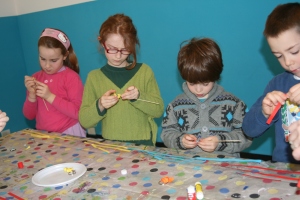
5. Put a dot of glue on the end of each spiral and glue it closed.

6 Now comes the tricky part – you will need to make pinch and bend the pieces to make different shapes which will form the parts of the fish.

7.  Take the large spiral and pinch the ends to form an ‘eye’ shape -this will be used for the fish’s body.

8. Use your index finger and your thumb of your left hand and the index finger of your right hand to squish the two small spirals into triangles. These will be the fins.
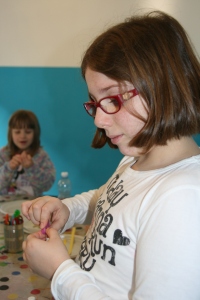
9. Use the thumb and index fingers of both hands to squash the last spiral (the medium sized one) into a  crescent moon shape.This will be the tail.

10. Pass the needle with embroidery thread through one side of the eye shaped piece, make a loop and tie a knot.

11. Glue each of the pieces together to form a fish. Let these dry.
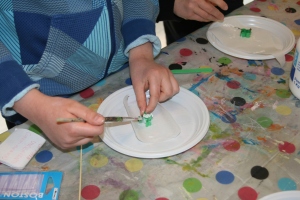
12. When you are finished, use the paint brush to pass Modge Podge all over the fish – on the top and the bottom and the sides.  This will make the fish harder.  When it dries, hook the fish onto a key chain ring and you are finished!

When it dries, wrap it up and give it to your dad on Monday.  Make sure you wish your dad a Happy Father’s Day from all of us at ARTiculation360.

I Like Bugs Workshop

To read this in Italian, click here.
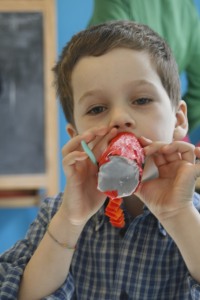
We were totally buggin’  out at our last Story and a Craft workshop. Even if you don’t like bugs, you will definitely like  I Like Bugs by Margaret Wise Brown.  It’s a cute rhythmic story all about…you guessed it, bugs!  The kids enjoyed the story, since it is funny, and gross (who wants to drink a bug?) and cool (who doesn’t like fireflies?) all at the same time. After we read the story, the kids made some bugs of their own.

Supplies:

  • walnut shells
  • marbles
  • permanent pens (we used sharpies and decorative markers)-
  • glue
  • paper
  • glitter and other things to decorate (optional)
  • googly eyes (optional)

It’s a very simple project, you’ve probably already figured out what you need to do.  Use the pens and glitter or whatever you have, to decorate the walnut shell like a bug.  You can make them funny, weird, mean looking – anything that you can think of. Don’t forget youcan use bits of paper to make wings, antennae or even teeny tiny legs.

When you are finished, put a marble underneath and you are ready to race! Let the bug races begin….ready, set….GO!